
Renovation - Farmhouse Kitchen
- Dec 10, 2025
- 5 min read
Updated: Feb 24
Right, first things first, if you've followed our #renovation journey so far, you might have noticed that some of the photos in our posts aren't your typical staged influencer pictures... firstly, we're not influencers. We share our journey as normal people, soaking up whatever weird, mundane or magical thing life throws at us, hoping to bring some down to earth #realism to the staged world that is sometimes presented to us on those tiny screens! Secondly, part of simple living, is staying present and absorbing the moment, so splitting between 'was that a good angle for that shot' and the actual job in hand, isn't the most appealing option... and thirdly, we just forget!
Now that's cleared up, time for the next instalment of our #farmhouse renovation and #redecoration, the kitchen! The #kitchen that was in the house was a lovely, good quality kitchen but it just wasn't us, nor, in our opinion, did it fit in with our lovely old farmhouse so we made inroads into making it feel more of country kitchen, the heart of the home.


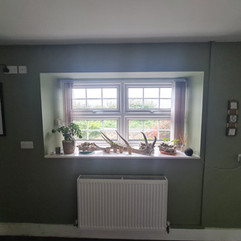
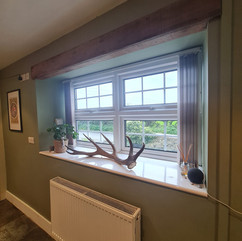
Priorities weren't prioritising, so the first thing we decided to do was add a faux beam over the window... in retrospect, paint the walls first, don't get so excited by the prospect of a beam that you get carried away and make your life harder down the line (thank God for painters tape)! Anyway... when we left our previous farm, we had to dismantle two old railway carriages that had been used by us and my Grandparents for years as lambing sheds, much of the wood was rotten but we managed to salvage a few of the floorboards. I knew I wanted to incorporate a touch of the old property into our new farm and this was one of the perfect ways to do this! So we measured the space, trimmed the boards to fit, gave them a little tidy up and secured them in place, creating the appearance of a window beam but holding so much history from our old property too!


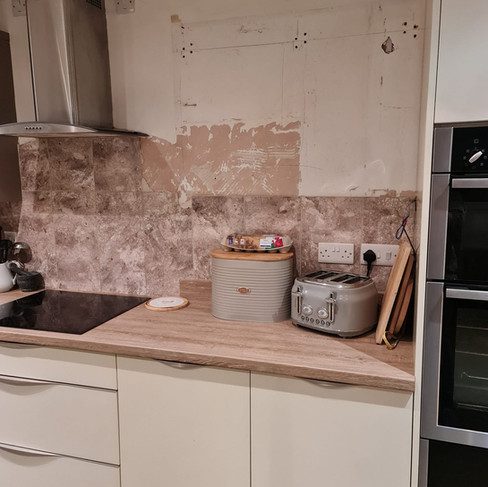
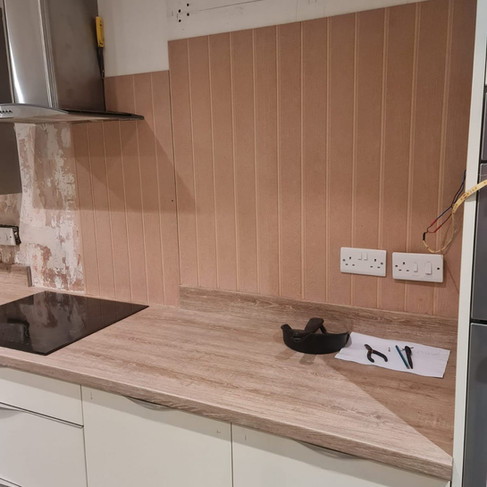
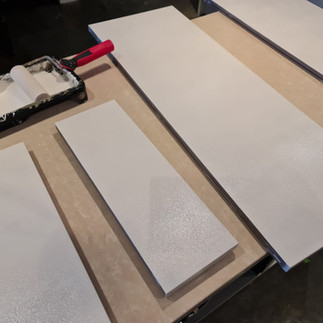
Next was operation remove old tiles... each to their own, but the tiles just didn't do it for us, so we got smashing and crow barring them off, they came off easily which we took as a sign that it was definitely the right thing to do! If you remember the utility to pantry renovation, you'll remember the excess of shiplap panelling, well this is the room it was originally ordered for! So we replaced the tiles with the shiplap boards from B&Q. They're great, easy to line up, cut and attach, plus they are mould proof, splash resistant and ready primed.


I think open shelving is very evocative of farmhouse kitchens so we also removed two wall cupboards, making space for two shelves. Again, we made these from reclaimed wood, drilling a shallow gully around the edge of the underside of the bottom shelf to add some LED under lights that were already in place. We also added brass tipping rails to finish off the look! You can find these online, and order them to length, if you can't find tipping rails look for picture rails, they're the same thing!
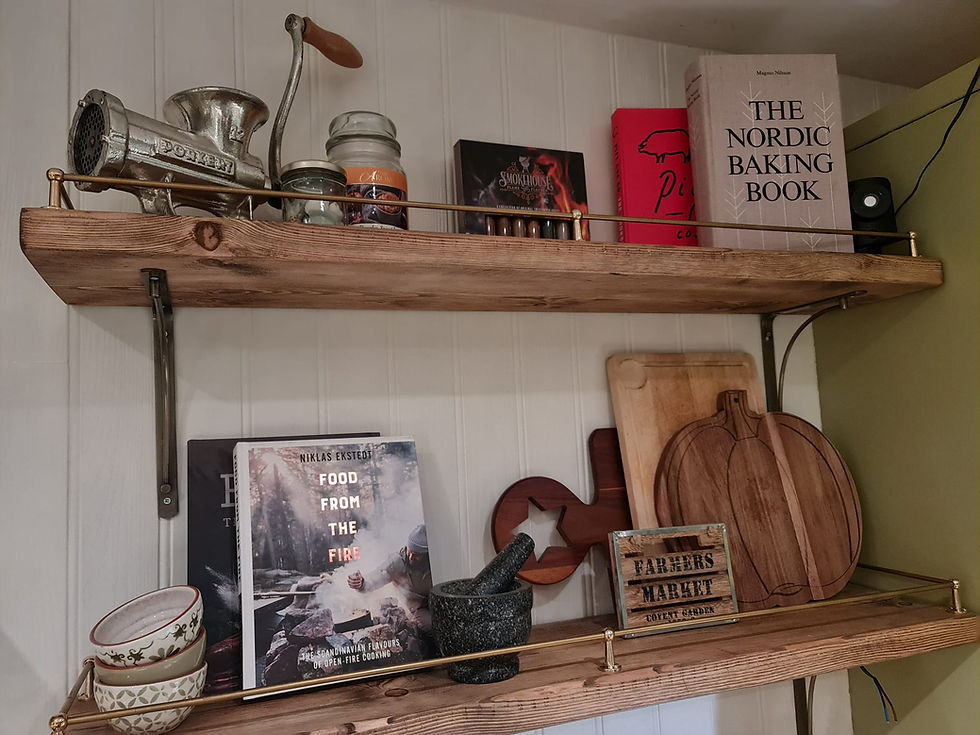
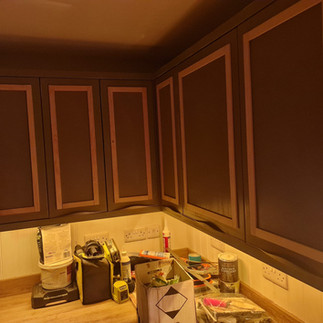
As always, the budget was tighter than bodycon dresses of the 2000's, so we couldn't afford new cabinets or even new doors, so we headed down to our local hardware store... we're definitely some of their most regular and (we like to think) favourite customers, especially when we take our little Lupine Dog, and sourced some wooden trim. Again, smooth cupboards just don't resonate farmhouse to us, so we added a trim around each door, gluing them on to add some much needed character. We also removed the old handles (this included much swearing, those buggers weren't meant to come off...). We also added some detailed trim to the edges of the island, again, adding some more rustic charm!
Finally, we were on to painting! We weren't going to change the counter tops, the main body is a light wood and the island is a white/cream silestone, so I decided a slightly off white would be good for the island and walls, complimenting the counter tops. Then to keep everything feeling airy, we went for a lighter sage green on the rest of the cabinets. We went for Rustoleum Kitchen Wall and Cupboard Paint in Sage Green and Antique White. Finally, we added some aged brass handles to the cupboards to match the brass on the shelves.


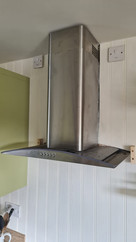
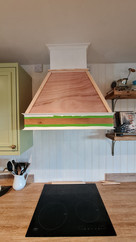
With the majority of painting done, the last job was to tackle the cooker hood. I don't know about you, but stainless steel bulky cooker hoods just don't do it for us, so we found a few tutorials, adapted them and designed our own wooden hood cover. It looks great and has really finished off the farmhouse feel we wanted. It's made from plyboard, some decorative trim and some reclaimed wood. Plus if anything happens to the hood, it pops off easily.


Because of the layout of stairs leading to the one side of the first floor and where the kitchen island is situated, there is quite a large space by the window which we wanted to utilise. In our opinion, with two big dogs, it wasn't feasible to have a table and chairs in here, however a breakfast bar would be perfect. It catches the beautiful morning sun, so you can watch the sheep or cattle in the field with the sun on your face enjoying a morning coffee... bliss! We had a few old doors lying around (told you, we can find a use for most things!), which would make the perfect breakfast bar, the natural wood grain is beautiful too which is a bonus. We attached this to the wall and added two black steel legs, et voila. A few other little bits and pieces to add farmhouse charm, like a battery powered light over the sink and brass skiffers on the island. These are great by the way, they're small metal corner pieces used to protect corners of skirting boards or cabinets... they finish the island off wonderfully. We also added a stunning hop garland over the window, it's the thing of dreams. It came fresh, so we hung it quickly and it has since dried in place, we've had it two years now and it's still going strong, we might look at a fresh one next season but at this rate won't need to for another year or so!


We also turned a big space under the stairs into our #Lupine Dog's hide out, Nuka is a type of wolf a like dog, so of course her space is complete with a forest, wolf and full moon mural I painted, fairy lights and the comfiest of beds! Perfect use of the space, and she certainly loves her bedroom!
We renovated the kitchen about two years ago now, and considering it's the main throughfare of the house for humans and animals alike, everything we've done in there still looks great, despite our limited budget! Sure, a few cupboard doors need a tiny touch up of paint but apart from that it still looks just how we imagined, farmhousey, bright, airy and comforting.

#lifestyle #lifestyleblog #consideredliving #seasonalliving #farm #farmblog #smallbusiness #renovation


Comments